On the first day of Christmas, crafting gave to me.....A super easy DIY Advent Calendar!
How else were we going to keep track of our days?
I enjoy paper crafting so I have a Die Cut machine and a Cricut machine at the house. I am going to show you the advent calendar I made using one of my die cuts, but also one that you can make from paper lunch bags that is super easy and super cute!
For the second type, I used plain white lunch bags to be decorated with stickers, stamps. etc. Very easy to place in a bowl or hang from ribbon on the mantle.
For more ideas, please check out 24 Advent Calendars to Create
Saturday, December 1, 2012
Wednesday, November 21, 2012
DIY Photography Box No. 2
Since my fluffy friend destroyed my first box, I created a second but different version.
You will need:
3 pieces of white foam board = $3.00 at dollar tree
2 pieces of white poster board = $1.00 at dollar tree
1 box cutter = $1.00 at dollar tree
clear tape = $1.00 at dollar tree
Total: $6.00
Step 1: Cut all three pieces of foam board in half.
You will need:
3 pieces of white foam board = $3.00 at dollar tree
2 pieces of white poster board = $1.00 at dollar tree
1 box cutter = $1.00 at dollar tree
clear tape = $1.00 at dollar tree
Total: $6.00
Step 1: Cut all three pieces of foam board in half.
Step 2:
Using your clear packaging tape, attach the three sides to a bottom. I used several layers of tape to stabilize the sides and back to the bottom.
As I'm working on this, mr. fluffy friend is rolling all over my poster board >:(
Step 3:
Attach the top of the cube to the bottom and three sides. You should now have a cube minus the front.
Fluffy friend could not wait to crawl inside, so I took his photo in the photo box :)
Step 4:
Use a piece of white glossy poster board and cut to width of cube. You want it to cover the back and slope to the front. I taped mine in place. This creates a seamless photo background.
Step 5:
I cute a flap in the top of mine to shine my light into.
This is a video of me using a wrapping paper roll to try and shoo my fluffy friend from my box :(
RIP Photo Box
I was really proud of my photo box....my cat was too proud apparently. All twenty pounds of him jumped on the cube thinking it was solid and he completely destroyed it :( Back to the drawing board.
DIY Photography Tent/Box
Have you ever made a really nice craft yet every single photo you took made it look BLAH. My camera seems to misrepresent the colors. I do a lot of paper crafts and having the correct color show up can be important. I would eventually LOVE to get a professional camera, but for now I found a much cheaper alternative!
Photography Light Boxes/Tents have been selling like crazy on Tophatter and Amazon for upwards of FIFTY bucks. After a little Googling and some help from Digital Photography School, I created my own :)
I used:
1.) Box from Walmart (14x14x14) = $0.68
2.) White Fabric (1 yard) = $2.97 Walmart
3.) Box Cutter = $1.00 Dollar Tree
4.) Tape = $1.00
5.) Poster Board = $.50 Dollar Tree
Grand Total: $6.13
Step 1:
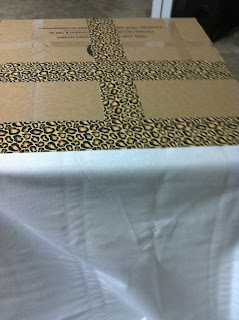
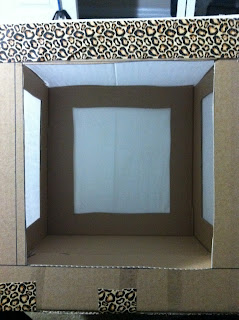
Cut the sides out of your box except for the back and the bottom.
I had to tape the bottom of my box shut since I bought a box.
This is not a required step, but my cat loves boxes.
My dollar box cutter worked wonderfully!
Cut the flaps off of your box so that the top is open.
I cut the back out of mine, but its going to be covered with posterboard so you can leave it.
You put your item in the bottom and shine your light through the top or the side to reduce the ugly glare
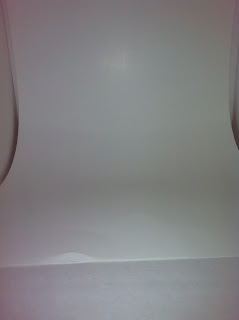
Line the back with a piece of white posterboard. Cut it extra long so it curves from the back to the front. Do not crease it. This provides a solid white background for your items.
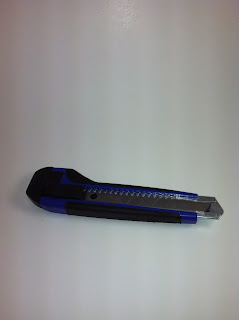
My boxcutter for example :)
Photography Light Boxes/Tents have been selling like crazy on Tophatter and Amazon for upwards of FIFTY bucks. After a little Googling and some help from Digital Photography School, I created my own :)
I used:
1.) Box from Walmart (14x14x14) = $0.68
2.) White Fabric (1 yard) = $2.97 Walmart
3.) Box Cutter = $1.00 Dollar Tree
4.) Tape = $1.00
5.) Poster Board = $.50 Dollar Tree
Grand Total: $6.13
Step 1:
Cut the sides out of your box except for the back and the bottom.
I had to tape the bottom of my box shut since I bought a box.
This is not a required step, but my cat loves boxes.
My dollar box cutter worked wonderfully!
Cut the flaps off of your box so that the top is open.
I cut the back out of mine, but its going to be covered with posterboard so you can leave it.
Wrap your box with your white fabric to cover all of your windows with white.
You put your item in the bottom and shine your light through the top or the side to reduce the ugly glare
Line the back with a piece of white posterboard. Cut it extra long so it curves from the back to the front. Do not crease it. This provides a solid white background for your items.
My boxcutter for example :)
Sunday, November 18, 2012
DIY Jewelry Display for Craft Fairs
Hey Ya'll!
I have two craft fairs coming up and I was looking for unique jewelry displays to match my color scheme of my table cloths and bunting...and couldn't find any I liked. The typical velvet displays only hold so much and look cluttered so I came up with my own design!
SUPER easy to make!
You will need:
*A mini tri-fold display board (or foam board). Mine was $1.97 at Wal Mart!
*Spray Glue
*Cup Hooks (8 for .97 cents)
*Decorative scrapbooking papers, wrapping paper, etc.
*Packaging tape for reinforcement
STEP 1: Cover your entire display with spray glue
STEP 2:
Cover with your choice of paper
STEP 3: Optional--Cover the entire display with packaging tape to reinforce and weatherproof
STEP 4: Install Cup Hooks
Screw the cup hooks into the board to hand your jewelry from
This can be hung on your wall or displayed on a dresser! I'm using mine as a display for my jewelry show!
Thank you!
Lindsey Dawn
Subscribe to:
Comments (Atom)


